
Repainting Kitchen Cabinets
In order to achieve the best results when repainting any type of cupboards, especially kitchen cabinets, consult with your local paint store professional prior to beginning. With that in mind, you can use the following outline of steps as a guide to preparing to transform your kitchen from an old looking mess to a beautiful new creation.
Please take note…the most important thing about this project is going to be the preparation process. Make sure that you have sufficient time set aside so that you will not be rushed.
Just so you know, I am a cabinet making professional of thirty years. Unlike many of the article you will find on the Internet, this one comes straight for the mouth of someone who knows what they are talking about when it comes to painting kitchen cupboards.
Tools Needed and Materials:
Phillips Screwdriver
220 Sand Paper
Dawn Dish Washing Detergent
Liquid Deglosser (optional)
Recommend Primer
Correct Paint
Paint Brush
Putty Knife
Drop Cloths
Steps for Repainting Kitchen Cabinet Doors
- Take all of the cabinet hardware off (handles or knobs).
- Remove the existing cabinet doors and drawers by using the Phillips Screwdriver. As an alternative, you can use an electric drill with a Phillips bit for this step as well. It’s possible that you may have clip hinges on your cupboard doors. I such cases you will not need the screwdriver to get them off of the cupboards.
- Mask off all areas where you do not want to get the paint and install the drop-cloths in to position.
- Clean all surfaces with a mild solution of Dawn Dishwashing liquid and water. Then, towel dry the areas really well.
- Either sand all of the surfaces lightly with the 220 grit sand paper or use a liquid deglosser by following the manufacture’s instructions. Wipe off all areas again with a clean rag.
- Fill any holes or flaws with wood filler and allow it to completely dry. Then, sand the area down smooth using the 220 sand paper. Wipe the areas clean again with a rag.
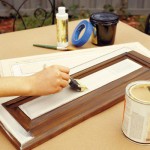
- Apply your first coat of primer to the backside of the doors. Then, give the cabinets one coat of paint while the doors are drying.
- Next, paint the frontside of the kitchen cupboard doors with the primer. It is vitally important that you allow the cupboards and doors to thoroughly dry anywhere that you are applying paint.
- After all of the kitchen cabinet parts have been primed, lightly sand out any runs or areas where there are blemishes showing. You may need to re-prime the areas after you have sanded things flush. Preparing the kitchen cupboards correctly, to receive the paint is the most important part of the project. So, take your time.
- Apply two coats of the final finish paint, allowing plenty of time for it to dry between coats.
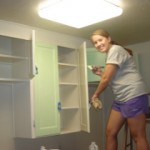
- Attach the doors and put the drawers back into their respective locations. Install the old cabinet hardware unless you are installing new cabinet door hardware.
- Do Not clean your cabinets for at least seventy two hours so that the paint has sufficient time too dry.
Additional Tips
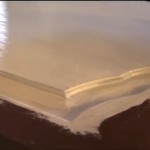
- When you are repainting raised panel cabinet doors place them on a flat surface and start painting from the inside of the groove outward. This will help eliminate the possibility of drips and runs.
- This should go without saying, but when you’re painting the kitchen cabinets and doors-make sure that you use straight even strokes.
- DO NOT hurry the process. The more you take your time-the better the results will be.
- If some of your paint brush strokes look heavier than others, while painting in one area, gently blend them together.
- If you locate drips while painting, remove all of the excess paint from your brush. Then, lightly go over the areas taking out the run with straight and even strokes.
- If you want to add some extra flare to the kitchen cabinet doors you can paint the grooved area a different color or stencil paint the cabinet door flat panels.
- If you want to add a slight antiqued effect to the look of the newly painted cupboards, you can glaze your doors after the final top coats have thoroughly dried.
There are other methods of painting kitchen cupboards where you can use a spray gun. This can be accomplished with a Power Wagner or you can rent a professional power airless paint sprayer. Just remember, whatever method you decide to use, take your time and do a professional job. If you do, you will enjoy looking at your repainted kitchen for many years to come. While you are in the process of revamping check out this article on remodeling old kitchen cabinets.