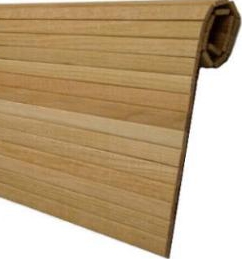
How To Make A Tambour Door
There are many pre-made tambour products that can save you the time of making a tambour door from scratch. You can even purchase them pre-finished in a limited selection of solid colors and stained finishes.
Now, I believe that the quality of making your own may be better than purchasing one from a factory. One of the great benefits to building your own is you get to hand select the wood pieces to match the other materials you are working with.
This is a great advantage because oak, maple, cherry and pine colors vary from batch to batch. When you are able to color match all of your cabinet woodworking project pieces, the result is a highly custom made piece of furniture.
The method described below is how I learned to make tambour doors many years ago. I have since built hundreds of kitchen cabinet appliance garage doors from scratch.
 Here are the tools you will need:
Table Saw
Chop Saw
High-speed Router
Five Sixteenths Inch Straight Router Bit
Quarter Inch Radius Router Bit
Vibrating Sander
Hammer
Razor Knife
Materials Needed:
Your Choice Of Custom Wood
Contact Adhesive
Canvas Fabric
- Cut your three quarters inch thick wood, three inches longer than the desired finished length of the tambour door, with the chop saw.
- Make a groove in a test board with your high-speed router and the five sixteenths inch (5/16″) straight cutter.
- Rip the boards for the tambour pieces into one quarters of an inch (1/4″) thick slats. Use the groove you made in the test board to ensure you make the strips the correct thickness. You want them to be ever so slightly smaller than the groove, just a smidgen. Make at least six extra pieces.
- Round the long edges of the strips with the quarter inch radius router bit. This is generally accomplished best when a router table is set up for running the strips through.
- Sand all of the tambour slats with 100 grit paper and then with 220 grit.
- Cut your canvas material with a razor knife oversize by a couple of inches in width and length.
- Layout the wood slats, face down, and spray them with the contact glue on the backside.
- Spray one side of the canvas material with the contact adhesive.
- After the glue has dried to the point of being tacky, align your first strip as straight as possible. The wood can be inset from the edges of the fabric because you will be trimming this entire tambour door to the correct length and width after all of the strips are glued in place.
- Tap the first strip with your hammer really good.
- Continue butting the quarter inch thick slats to each other and pounding them secure with the hammer.
- Cut a five eights inch thick board that is two inches larger than the tambour door fabric in both directions.
- Screw the tambour door to the board. These screws must be placed far enough toward the inside that you won’t cut the screws off and cause the tambor to come apart from the five eights inch (5/8″) thick board underneath. Remember, this door is oversize so you should be able to screw it fast using the end slats at the top and bottom of the door. The strips you screw through will not be a part of the finished tambour door. The fabric should be inset from the board underneath. The five eights inch (5/8″) thick board’s edge will be the one placed against the table saw fence.
- Now, run the board through your table saw cutting one side of the tambour door straight and square. This cut obviously leaves the door oversize, but creates a nice finished edge on one side of the tambour door.
- Set the table saw to the exact size that you need the door to be and cut off the other end of the tambour door.
- Remove the screws and cut off the slats from the top and bottom that you do not need with the razor knife.
Now, this method is a little different from the one demonstrated in the video, but it works very good for making tambour doors for cabinets, appliance garages and roll-top desks. There’s no rule of thumb when you make a tambour door. All you have to do is use common sense in relation to the tools you are working with.
