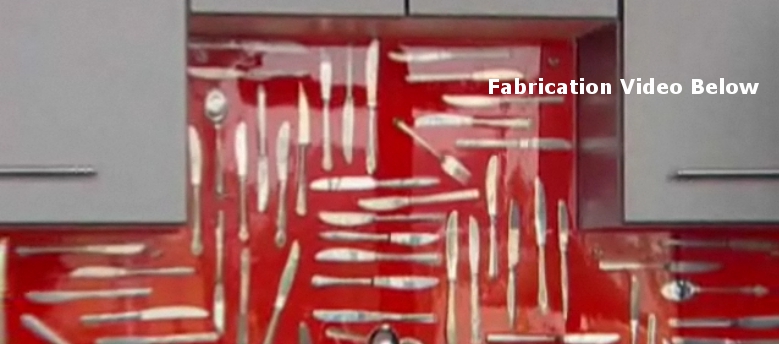
Custom Kitchen Backsplash Ideas
This is the most unique custom design for a kitchen wall area backsplash I’ve ever seen. I rank it at the top of the list for creative ideas for wall splashes. The video below introduces something different from the norm for kitchen countertop backsplash ideas. I am confident you will enjoy watching this unique method for building wall splashes.
You can create a custom backsplash with depth and texture that will be the envy of all your neighbors, by pouring resin over common household objects.
Video Source 5 Minute Videos
Making A Resin Epoxy Coated Kitchen Splashback
The first thing you will need to do is create a foot print or pattern around the cabinets. The wall boards should be fabricated out of plywood and can be laminated with your choice of Formica plastic laminate. This particular one was laminated with red.
You need to add trim wood edges around the form to create a recessed appearance. These edges will contain the resin when it is wet and being poured. It is actually a tray that will allow the resin to pool up.
Prior to mixing the two part epoxy, you will want to add masking tape along the inside of the wood edges. The tape is less porous than the wood.
You will need to spray the masking tape with cooking oil so that the resin cannot stick to it. This will allow the edges to come off easy. Make sure you DO NOT get any of the oil on the flat surface where the epoxy will be poured and needs to adhere. Use some sort of shield as you spray to keep it off of the flat part.
You need to drill some holes in the wall-splash boards in order to be able to attach them to the walls. Use a five sixteenths inch drill bit and then you can insert short straw pieces in the holes when you pour the epoxy resin. Don’t forget this step; it’s very important. The straws protect the holes from the resin going in the holes. You can spray a little cooking oil on them as well.
Now you are ready to mix the epoxy. The resin comes in two parts that get equally mixed together. Pour the liquids into a five gallon plastic bucket and stir them with a long stick. You want to whip them like mixing cake mix. The two parts need to be stirred for about one minute.
Pour the resin into your custom kitchen backsplash tray. Using something hard that is about eight inches by ten inches, spread the epoxy all around evenly. You want it to be about one eight inch (1/8″) thick.
You are going to be building the coats up after each one hardens a little bit.
What items do you want to put in the liquid?
In video creator gives a few ideas for custom kitchen resin splashbacks:
- Shells
- River Rock
- Silverware
- Bottle Caps
- Baseball Cards
- Family Photos
- Anything You Like
- Just Be Creative
While the first coat of epoxy is wet, start placing your items in the resin. Once you have installed your unique decorations, it’s time to pour on another coat of the liquid clear-coat.
Once the materials have completely cured, remove the wood edges. You can fasten the custom backsplashes to the kitchen walls using decorative grommets and screws. You may need to install some wall anchors if there are not any studs where you drilled the installation holes in the wall-splash board. For more creative backsplash ideas visit a few video sites.


