Renovating Kitchen Cabinets-Antique Glazing
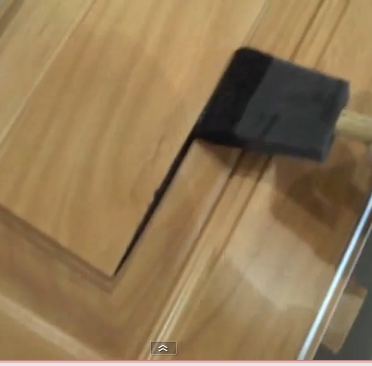 The video below demonstrates glazing techniques for kitchen doors. If your existing cabinets are clear coated, this is a great way upgrade old doors by adding a nice pin strip. It’s an easy refinishing process that takes a little specialty stain and a can of clear spray lacquer. You will be able to apply this dark antique brown color everywhere that it will stick on routed details or in the crevices of your cabinets.
Important: Before applying any of the spray lacquer, test compatibility on a small area on the back of one of your kitchen cabinet doors. If the paints fight with each other, try using a spray polyurethane. Lacquer is preferred because it will dry in a few minutes compared to long drying times associated with other top coats.
Antiquing Cabinet Doors With Dark Brown Accents
Materials & Tools Needed
- Van Dyke Glazing Stain
- Foam Applicator Brush
- Lent Free Rags
- Aerosol Can or Clear Wood Finish Lacquer
- Stir Stick
- Saw Horses or Worktable
- Respirator Mask
- Rubber Gloves
How to Add a Pin Strip Glaze to Kitchen Cabinet Doors
This is a great way to make cabinets look antiqued and older looking. Renovating your cupboards this way is going to require a well ventilated area when it comes time to apply the lacquer to the cabinets. Open as many windows as possible as well. This is a very strong smelling chemical finish.
It’s always a good idea to put down plenty of drop cloths or old sheets on the counters and flooring.
- Open the paint can. Dip a long stick inside and place the liquid from the stick onto the paint can lid.
- Lightly dip the foam applicator/brush it the glaze. Only get a little bit of the dark brown finish on the tip of the brush.
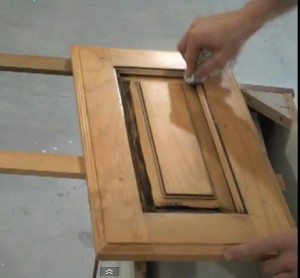
- Apply the stain by making a line right down the edge of the door along the details. Do one section at a time. Do the raised panel of the doors first and then use a clean rag to wipe it off. Next, brush the finish on the inside of the frame and then finally on the outside of the frame.
- When wiping the glaze off, use the tip of your finger on the rag. You want to be sure that you don’t leave any rag marks. As you are removing the stain, it will leave the excess glaze in the corners of the doors.
- When applying the glazing compound to the inside of the door frames, you want to work the finish in really well because of the seam in the wood. Always apply the painting glaze nice and even.
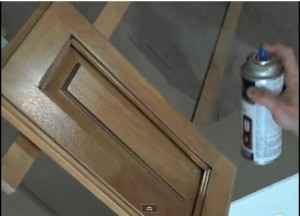
- Take the clear spray lacquer and shake the can well. Place the glazed kitchen cabinet part on a flat surface. Obviously, you just finish the cabinets in place. Hold the aerosol can about twelve inches away and spray the length of the door first with a light coat. Then, immediately spray the width of the door with a light coat. Allow it to dry for about a half hour and repeat the process once more. The first application will have a slight foggy appearance. When you apply the second application it will clear up.
- Once the final finish is dry, hold the kitchen cabinet part so that the light will show you if the final coat covered well. If you need to redcoat it, do so.
When this final step of glazing your kitchen cabinets is complete, allow the doors and cabinet parts to dry for at least an hour before handling them. Antique glazing is a great way for refinishing old kitchen cabinets. You can ad a high-end look to an old set of cupboards in a matter of hours.

