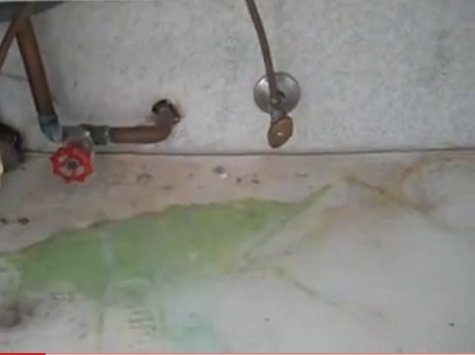
How To Fix Flood Water Damaged Cabinet Bottoms
Before you decide to replace cabinetry, it is possible to fix water damaged kitchen or vanity sink cabinet bottoms. If your kitchen, bathroom or laundry area has been flooded, you may need to review the article that we have called, “repairing water damaged cabinet toe kicks.” More oftentimes than not, they are repairable. Of course, this will depend upon the extent of the damage in every case. Depending on your level of craftsmanship, you may want to hire a professional bathroom or kitchen cabinet installer to do the work for you. Matters such as this have many unforeseen obstacles that a cabinet professional will easily maneuver around.
There is a rising concern about the effects of mold in our American society. Make sure that a repair is not going to be hazardous to your health in the long run. As you probably already know, many Formica cabinets have been fabricated using particle board. The wood actually reacts like a sponge when it gets wet. Slow leaking plumbing pipes in sink cabinetry areas will eventually cause this type of board to swell. It is quite possible to repair effected areas without replacing an entire cabinet or in some cases the whole kitchen, bath or laundry room cupboards.
Replacing A Water Damaged Cabinet Bottom
It’s important to understand that the supporting structure of your cabinets comes mostly from the sides rather than the bottom. Therefore, fixing a water flood damaged sink cabinet bottom will not affect the support system of the counter top in any way. Depending on the extent of the damage, there are two basic approaches to take.
- The entire bottom gets removed.
- A new one is cut to fit over the top of the old.
This is going to be a time consuming process. Make sure you are not rushed. Your going to be removing cabinet doors, tearing out the old wood, spraying mildew remover, installing new supports and anchoring the new bottom in place. It doesn’t sound like much, but to do it correctly, you will need to take your time.
Tools and Materials Needed:
- Saber Saw
- Hammer
- Electric Drill
- Caulking Gun
- Formica
- Plywood
- Nails, Screws or Staples
- Table Saw or Skill Saw
In either case, please make a mental note that you will have to deal with the existing plumbing pipes being in your way. Also, the type of cabinet you have will determine the amount of piece work that may be required.
What do I mean when using the term “piece work?”
On many occasions, I have had to install the new bottom using two to three separate pieces of plywood. This is generally the case when there are a lot of plumbing obstacles to work around. Once they were fastened securely in place, I then laminated over them with Formica.
For a European style cabinet there will not be a center stile to contend with and you should be able to just slide a new one in without having to cut anything. For a face frame constructed box it may be necessary to cut the center stile out in order to get the new board in place. By examining the area very closely, you will be able to determine all of the cuts that will be required, either on the existing structure or the new part to be installed.
 * Repairing a water damaged cabinet bottom by placing a new piece of wood on top. If you decide to just lay a new piece of wood on top here’s a suggestion. Drill some vent holes in the toe base, as high as possible to allow for ventilation, so things can dry out underneath.
Then, you can spray some cabinet mold killer through the holes. Position a fan to circulate air through the holes for several days. Sometimes there is a warp or dip that will require placing some type of shim material between the new and the old cabinetry part.
If you are dealing with a face frame style, you may have to insert two separate pieces in order to bypass the plumbing structure. It will be important to use caulk in the seam and any void areas along the edges. After the new cabinet bottom is in place, you will either need to fill and paint the edge or laminate a strip of veneer or plastic laminate (or, “Formica”) over the two edges.
In cases where I have had to use two separate pieces of wood for the bottom because of the plumbing obstacles I then was able to laminate a third piece of 1/8″ Masonite or mica over them. Both of these thin materials are flexible enough to aid in working around the pipes sometimes.
* Fixing a water damaged sink cabinet bottom by tearing (or, “removing”) it altogether. Well, obviously you will need to remove the old one and spray mold killer underneath. This is usually done with a saber saw and a hammer.
Use a pair of diagonal cutters or needle nose pliers to break off the old rusty fasteners.
Grab the staples and wiggle them back and forth until they break off. It will also be necessary to lay some 2″ x 4″ material or other boards underneath, built up to the proper height. You can liquid nail the support boards to the floor and then liquid nail the cabinet bottom onto the supports. It may be necessary to add some cabinet shims between the toe base and the new board to even things out.
L-brackets for cabinets can be useful in this stage also if you don’t mind seeing them. If strategically placed, they will not be very noticeable on some cabinet designs.
Those are the basics of how to fix a water damaged sink cabinet. A couple very important ingredients to being successful at this type of cabinetry repair (flood damage) are patients and planning. Oftentimes, projects like this are worked out as you begin the hands on process.
Replacing a sink cabinet bottom can save a lot of money in a couple of ways. Otherwise there would be two expenses involved in replacing the entire sink cabinet, one being the cost of a plumber and two the purchase of the new sink cabinet. If you are uncertain about installing a new cabinet, you will need an installer.
This is not a task that should be taken on unless you have good finish carpentry skills.


Thanks Jordy,
I am ready to tackle a water damaged cabinet bottom after reading your blog. I appreciate your dedication to sharing this valuable information. I have read where some people line the new bottom with vinyl flooring which wraps up the sides by 2″ to catch any future water spills. Do you suggest that remedy? I will have to replace in two sections due to center stile and plumbing. I also have heat duct under sink at toe kick area. At least this helped to dry out the area! Sheree in Michigan (Home Depot Decor specialist)
Jordy,
Great piece of information, I’m sure I will be able to use it in the future. I had a question though concerning the end panels of the cabinets. They are laminated particle board, and since the feed line leak from my fridge occurred, I noticed that several of the base cabinets end panels have begun to swell. I have a granite countertop in my kitchen. Will the integrity of the cabinets be compromised by this condition, and should they be replaced? Any feedbac would be greatly appreciated.
Yes, you should certainly do something with them. Oftentimes, the damaged areas of the end panels can be cut out and an additional end panel fastened to the existing one. This article explains the process: https://fixmycabinet.com/2008/12/09/how-to-repair-water-damaged-cabinet-sides/