How To Make A Formica Door
Little did I know that when I was learning how to make a Formica door that this would be one part of cabinet making that I would not enjoy doing during my thirty year carrier. Most people in the business feel the same way that I do. The reason is because this part of cabinetry fabrication is time consuming and very messy.
Making a plastic laminate cabinet door really is a simple process once you understand the necessary steps that need to be taken. The best way to learn is by watching a professional do laminate work.

Applying Formica Door Edges
- Tip: When you are applying the wax to various places on the mica doors, be careful to not get the substance on any areas where you will be applying contact cement to create a permanent bond.
One of the most important things to know about fabricating a Formica door is that the laminate needs to always be cut oversize. Once the mica is contact glued in place, it should always overhang the board that it is glued to so that it may be cut off by using a router. You may refer to an article on our site called, “tools needed for Formica Work,” in order to get prepared for the project.
When Making A Mica Cabinet Door, The Board Must Be Straight
Here are the first steps that will be necessary when you begin making the mica door for your kitchen, bathroom, vanity, wall-unit or office cabinets. Plastic laminate doors are generally 5/8” to 3/4” thick. The actual wood core can be cut using medium density fiber board, particle board or plywood. The most important factor to consider when choosing the type of material that you will make the core of the cabinet door with is how straight the board is.
If you start with a warped board you’re only asking for trouble. The material must be straight. If there is a minor bow, it is possible to work it out, but it must be a minor bow. IF you continue, you will end up with a warped cabinet door.
The proper way to fabricate a Formica kitchen cabinet door, so that it remains straight over the course of time, requires that both sides of the board be laminated with Formica. This means that you begin with a raw board and laminate both sides with the same thickness of mica. If you think you can use melamine board and only cover one side with mica, it will surely warp, they always do.
The reason that doors warp is because the pressure on the board is not equal, this is generally due to the cabinet craftsman’s negligence or lack of knowledge about what I am talking about. Follow this article to learn more about why cabinet doors warp.
The Step by Step Process of Making A Formica Cabinetry Door
Here are the steps that will assist you with the process of making a cabinet door out of Formica. If you take your time you will succeed at the task at hand. I would recommend that you definitely make a trial door before actually working on the real thing. If you are not sure how to calculate the proper size of your doors, refer to this section called, How To Figure Formica Cabinet Door Sizes.
- Tip: If you have a lot of doors to laminate, use a lessor expensive Formica on the backside of the doors. Supply companies usually have what they refer to as a commodity white. This will be cheaper than using the actual color of the face of the cabinetry doors.
Make a list of the sizes that the boards will need to be cut to.
Make a list of the face Formica door pieces that will need to be cut and also the backside laminate pieces that are needed as well. Add one inch to the cut size of the door board to determine the proper cut size of the mica.
- Example: If your door size is 20 x 20 inches, the laminate should be cut 21 x 21 inches.
Cut your edging strips oversize as well. If your using 5/8” thick material cut your strips 7/8” wide. The strips will need to be about 3/4” longer than the door’s edges.
Next it may be necessary to cut the edges of the strips square on one end. You can do this with a paper cutter, radial arm saw, chop saw, speed square & tin snips or table saw. If you’re using a saw, sandwich the pieces between two pieces of wood that are about the same width of the strips. This helps to keep them from chipping while you are cutting. Sometimes it is necessary to even add a third piece of wood where the laminate wants to chip. Just be careful not to cut too much off.
- Tip: Protect work areas, floors, tables and walls from getting contact glue on them with cardboard.
Now it’s time to begin applying the contact glue. To learn a little about the proper glue to use refer to our article about what kind of glues should be used on Formica.
Layout several doors on your work bench, flat and tight to one another. Spray the backside of the doors with contact glue. When you are spraying use a smooth back and forth motion with long strokes moving left to right in a span of about three feet with each pass.
DO NOT get the glue so thick that it is really wet. You must cover every bit of the surface. I usually make an extra pass along the edges because this is the most critical place where damage could occur if the laminate does not have an excellent glue bond.

Always wax the mica where the router bit will be trimming. This protects the edge from router burn and scratches.
The easiest way for an armature to achieve success when sticking the two pieces together is by using dowel rods. Place several dowel rods on the pre-glued board then set the Formica on top of the dowel rods. Align the mica so that it will cover the door entirely. Very carefully start in the center of the door and begin to pull the rods out one at a time. As the Formica lays onto the board press it into place with your hand.
- Tip: When you stick the two surfaces together that have contact cement on them there will be no flexibility for making adjustments. So, make sure you get the laminate aligned perfectly before you stick the two pieces together.
Roll it well using sufficient pressure and route it using the tools that we suggested in our article called. Tools Needed to put Formica on a Cabinet.
Next you will need to block sand the edges of the mica flush with the board.
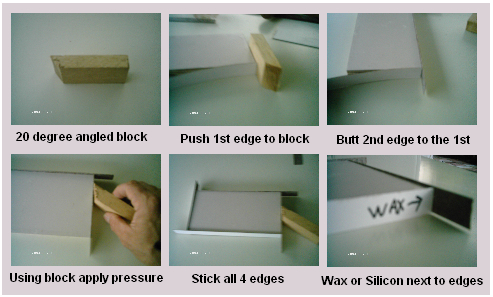
Applying The Edges-refer to photo at the beginning
Stack the doors on top of one another that are the same size with the Formica that you just glued on the door facing downward.
Now spray all four door edges with contact glue. Use a board or piece of card board that you do not need to place the door edge strips onto. Spray the board or cardboard with a moderate coating of contact cement and allow it to dry. Place the door Formica strips onto the glue in a perfect row with the finished side of the laminate facing down. Now spray the raw side of the mica with glue. Let the glue dry.
Sticking Formica Door Edges
Separate a door from the stack. Taking a small block of wood 2 1/2” x 4,” with a fifteen to twenty degree angle on one short end, butt it up against the corner of the door and then apply a strip of Formica tight to the block.
This will cause the mica to be perfectly flush with the corner edge of the door. Using your finger as a guide apply the strip to the edge allowing the piece of plastic laminate to overhang on both sides of the door.
Once it is in place use the angled edge of the block of wood to press the mica firmly onto the board. Now take your next edge and butt it tight to the laminate that is hanging paste the corner of the door and repeat the process.

Protect from router burn-apply wax
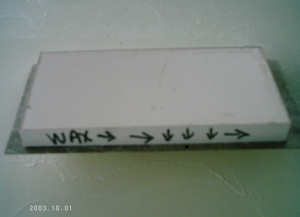
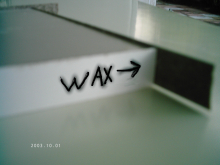
Once all of the door edges are on, use some gulf wax just under where the mica is hanging over. This will protect the Formica door edges where you will be using the router to cut the edge off.
Tip: Applying Gulf Wax or silicon spray on the areas where the router bit will be running is a must. Always be careful to not get the wax or silicon on the surface of where you will be applying the contact. Glue.
Next trim the edges with the router, again moving in a counter clockwise direction.
Now you will need to belt sand the mica completely flush with the raw side of the door. This works best if you place the door on a piece of carpet or make an L-shaped jig that will hold the door in place while you are sanding. You may also try to clamp it. Make sure that the direction of the belt is always pulling the laminate edge toward the center of the door instead of away from the door. This will ensure that the door edges will not chip as you are running the belt sander.
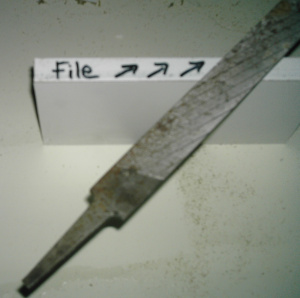
File the Formica flush on the edges and backside of the door. Now you’re ready to apply the face piece of laminate the same way that you did the front. Once you have finished bonding the face, wax or silicon the edge and route it off.
Tip: Be really careful when you are rolling the plastic laminate to nor crack it along the edges.

Filing the mica face flush to the edges
Now you will need to file the door face mica flush with the Formica edges.
Clean the door by following the directions in our article explaining, How To Clean Contact Glue Off of Cabinets.
Follow the steps and you will learn how to put Formica on a cabinet door after a few tries. You should learn the process by making a trial mica cabinetry door or two. Once you have each step down, really well, then you should work on your actual kitchen, vanity, office or wall-unit part.
Learning the art of fabricating a plastic laminate door is going to take a lot of patients. One of the most difficult steps is filing the Formica. It’s important that you do not get in a hurry. Remember, when you work with straight materials you will have a straight finished product.

I still want to know how to make my slightly warped 1′ x 2′ x 3/4″ plywood door perfectly flat before applying formica. Do I soak it in water? What?
All the information that you need is in this article.
How to Fix Warped Cabinet Doors