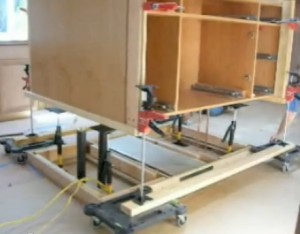
Freestanding Island Sink Cabinet Installation
 When you have a freestanding island sink cabinet it can be a little challenging to get the holes drilled for the plumbing pipes in the right place. In this article, we will explore how I would approach this situation. I’ve installed many of these island cupboards during my thirty plus years of my kitchen cabinet carrier.
Accuracy In The Layout
The most important part of this process is going to be getting the pencil marks on the floor in the correct location. These lines MUST be right on the money. I always draw exactly where the cabinets will be located, including making marks for the fillers as well. If you mess up the layout you can clean the pencil marks off with lacquer thinner and start over.
 First Method
Large pieces of cardboard or a regular piece of wood, the size of the sink cabinet bottom, can be used as a template. Measure from the edges of the layout lines you drew on the floor and transfer the locations of the plumbing pipes onto the cardboard or wood pattern. Double check all of your measurements before drilling any holes.
Did you catch that? I said double check your measurements!
Bore the plumbing pipe holes out using drill bits that are about a half inch (1/2″) bigger than the actual pipe thicknesses. Don’t worry about the oversize holes, plumbers have sleeves they slide over the pipes. Place the template over the floor water supply lines and drain pipe to see if you measured and drilled the holes correctly.
Place the pattern on the island sink cabinet bottom and make your marks for where the holes for the pips should be drilled.
- Tip: It’s important to drill from the inside of the cabinet to ensure that you do not damage the interior of the sink cupboard bottom. Drill bits can tear out large sections of wood when they are exiting the opposite side of the hole.
Method Two
Follow the steps above, except eliminate the cardboard template and transfer the measurements from the floor directly onto the island sink cabinet. Triple check what you have marked and drill your holes when ready.
There is never “any” reason at all to get in a hurry when you are installing a kitchen island sink cabinet. You should not rush through marking it, drilling the holes or setting it into place.
It is a good idea to have an extra pair of hands to help with dropping the island sink cabinet over the plumbing pipes.
If you make a mistake, just cut the entire area out square and then fabricate a separate board to slide over the pipes after the cupboard is fastened secure to the floor.
Read this article on How To Install Cabinets Level.
Securing an Island Sink Cabinet To The Floor
This operation just takes a little common sense in order to get it right. You are going to need to install some sort of cleats or brackets to the floor in order to have something to fasten the cabinets to.
I have fabricated one and a half inch square cleats (1-1/2″ x 1-1/2″ x 15″) and used tapcon screws to fasten them to the concrete floors. Once they are solid and secure, I then screw the cupboards to them. Every kitchen island cabinet installation is going to be different depending upon how the cupboards are built. Here’s a good article to review called: Attaching Cabinets To Concrete Floors .
The main thing you must NOT cut any corners on is-ensuring that the freestanding island cabinet installation is not wobbly. When you have installed the final screw in the island cupboards, they should not budge at all when you try and wiggle them.
