Tips For Attaching Wall Fillers To Cabinets
 If you are getting cabinets from Home Depot or some other super center, you will have to attach the wall scribe fillers yourself. Kitchen and bathroom cabinets are generally made in three inch increments.
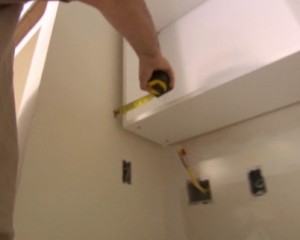
If you have three thirty inch wide cabinets and a ninety three inch measurement from wall-to-wall, you will need to install fillers on each end of the cupboard run. In this scenario, it would be best to attach an inch and a half (1-1/2″) wide scribe board on either end next to the wall.
Walls, floors and ceilings are never flat. You may have to fit the cabinet filler to a curve in the wall. Most standard fillers are three inches in width straight out of the packing box.
You will never be able to order the scribe pieces already cut to size. This is something that you will have to do yourself. If you do not know how to use a table saw, refer to this article: Table Saw Cutting Instructional Video.
Tools Needed:
- Table saw
- Belt sander
- Drill, driver bits and drill bits
- Clamps
- Caulking gun and caulking for cabinets
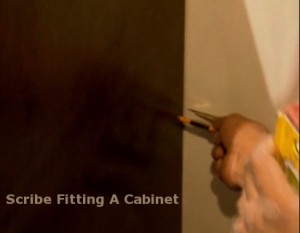
Hold the wood tight to the wall where it needs to be installed. While keeping it in position, place a pencil flat to the wall and touch the lead to the filler. Now, move the pencil in such a way that it follows the contour of the wall and traces the shape onto the cabinet filler.
 Sand the excess wood off of the scribe board with a belt sander. Determine how big the filler needs to be ripped to on your table saw and cut off the excess by placing the straight edge of the filler tight to the table saw fence.
Alternatively, you can freehand cut the curved marking with a table saw rather than sanding it to the mark with a belt sander.
Should the filler be attached to the cabinet before it gets anchored to the wall?
There’s no rule of thumb for this procedure. Use common sense for each situation you are dealing with. Some cabinet installers always fasten the scribes to the boxes first and others like to wait until the cabinet is fastened to the wall. The method you use for installing the cabinet fillers is totally up to you.
How should I attach the filler to the kitchen or bathroom vanity cabinet?
 You can secure the scribe piece with either staples or screws. The filler strips can be nailed or screwed from the inside of the cupboard sides or screwed on from the outside. Some situations may require adhering what is called “dead wood.” This is just an additional piece of scrap wood that gets secured to the cabinet side first and then the actual filler attaches to the dead wood.
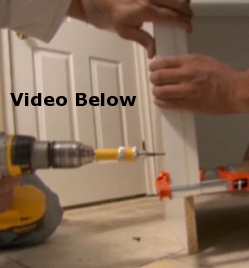
It is best to use clamps to hold the scribe board in place while you are drilling the pilot holes, screwing or stapling the filler to the cabinet side.
In order to attach the scribe filler properly, you should drill the necessary pilot holes and use a countersink wherever possible. Omitting these steps could result in splitting the wood, breaking off screw heads or the screws will not seat properly.
- Caution: Be extra careful to not use too long of a screw because you will run the risk of splitting the scribe. Also, drywall screws do not work well for attaching fillers on to the cabinet. They do not have a high enough sheer strength and will oftentimes break off while screwing them into hardwoods. You can install cabinets with drywall screws, you juts have to be extra careful to not break off the heads.
Installing your cabinets like a professional will require that you take your time and fit things right. Large gaps left to be filled with caulking are not acceptable. Every cabinet filler should be fit perfectly to the curves in the walls and installed tight to the walls. A maximum of one sixteenth of an inch (1/16″) is acceptable, but never desired. Always strive to make the cabinet scribe fillers fit tight to the walls.
A final thought, always attach the scribe filler nice and flush to the cabinet face. If it takes a few tries to get the fillers aligned properly, take the time to flush them up really nice. In the end, you will appreciate that tip a lot as you marvel at what an awesome cabinet installation job you did.
